Tag: Hardware

  • Reinstall MacOs

    Reinstall MacOs

    For a reason or an other, you may want to reinstall MacOs, maybe you changed your drive or you bricked your device, in any case here is a little post about how to reinstall MacOs and debug steps if it fails.

    The easy task that may save you a reset

    An easy task that resolves a lot of bootlooping problems or just macs that won’t boot is to reset NVRAM Memory. This memory is responsible of storing some Mac settings but this is not used to store user data, so you can reset it to unlock macs in some situations.

    To reset NVRAM shut down your mac then hold Alt + Command + P + R

    Keep these key down until your mac start restarting two times then let go.

    If that doesn’t resolve your problems, you can pursue to reinstall MacOs.

    Installation using Recovery Mode

    On MacOs, depending of your version you may have a recovery partition that will help you recover your OS.

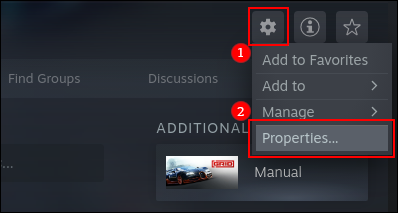
    To boot into Recovery Mode, restart your Mac and hold down Command + R as soon as your Mac shuts off and while the computer is booting. Then, release the keys, you will see the Apple logo, then the following screen :

    You will be welcomed with this screen (Can change depending of your version)

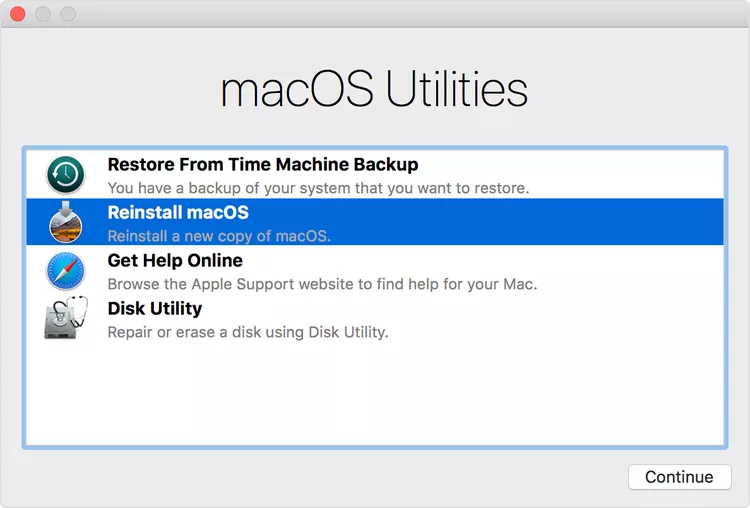
    Click on reinstall MacOs, then click on “Continue” and follow the instructions.

    Your mac should reinstall it’s OS while keeping your user data. This will fix your mac if something was wrong or corrupted on the operating system side (OS).

    If this step don’t fix your mac, see other solutions below.

    The easiest way : Online recovery

    If the previous recovery option didn’t worked or you don’t care about the data on the drive and you have access to an internet connection, you can just use the internet recovery option. It’s by far the easiest way to install an operating system, on any apple computer.

    Just shut down your mac then, press Option + Command + R to reinstall the latest compatible OS version for your mac.

    Alternatively you can use Control + Maj + Command + R to install the version of MacOs that was installed when it was released or the closest one.

    Follow the instructions, and you should be good to go.

    If the installation fails, check the debug steps below.

    Troubleshooting

    • Check your connection, you should have a DHCP IP address and a working internet connection for this method to work.
    • Try to update your NTP server on your mac :
      For that open your terminal and type sudo ntpdate -vu time.apple.com
      Note that sudo may not be necessary. If that fails, you may have a connection problem.

    The hard way : Complete wipe

    If you don’t care about the data on your drive, or you don’t have any more options, you can erase your disk and start from fresh.

    1. Shut down your mac
    2. Boot in recovery mode : Command + R
    3. Select your disk on left pane
    4. Click Erase
    5. Choose Apple File System (APFS) as your format
      Note : If you are installing High Sierra or earlier, choose MacOs Extended (Journaled)
    6. Give your disk a name, default is “Macintosh HD
    7. Click Erase
    8. Exit the disk utility
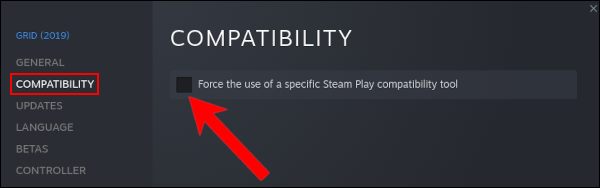
    9. Click “Install MacOS
    10. Follow the instructions

    Create a Bootable USB

    If your drive is completely empty, or you have no way of recover from internet or from the recovery partition, you can create an external bootable device to reinstall MacOs on your device.

    Note : To create a bootable media for MacOs, you will need another MacOs device. I didn’t found another reliable way to do it for now.

    To do that you have to download the MacOs installer that you wish to install and that is compatible with your device. The easiest way to do that is to download it from the AppStore if you have an other Apple device on hand or using a external app.

    Then, you will need an USB stick, 16GB is recommended for latest systems, but 8 can be enough for an older one.

    Connect the stick to another Mac, format it to APFS for latest OS releases (After High Sierra) or in HFS (Journalised) for pre-high sierra.

    Then open a terminal and type the following command and change “RELEASE” to your MacOs version (Use tab to auto complete) and “USB NAME” to your USB key name.

    sudo /Applications/Install\ macOS\ RELEASE.app/Contents/Resources/createinstallmedia --volume /Volumes/USBNAME

    If the command don’t work, make sure thatthe MacOs installer is in your “Applications” folder, also try to delete the paths and use tab to autocomplete.

    Install media creation

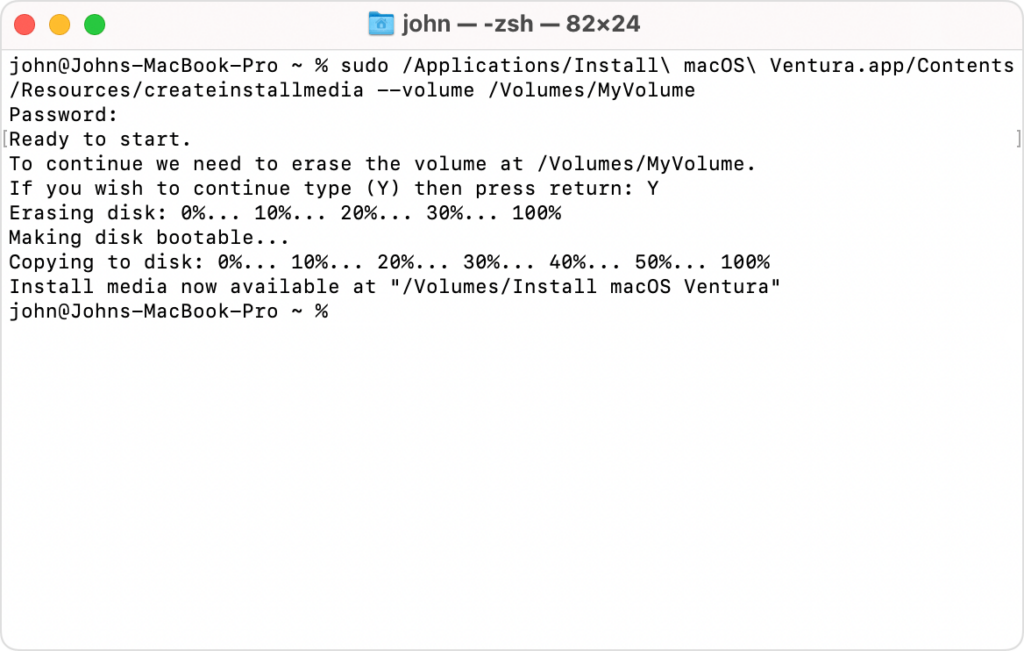
    You should be seeing a loading in your terminal window, just like in the picture.

    When done, remove the USB stick, plug it into the Mac you want to recover and press alt while booting.

    You will have the choice to boot off the integrated storage or your USB key, choose the USB and follow the steps !


    And here you go ! You reinstalled MacOs on your device.

  • Linux Gaming & How To

    Linux Gaming & How To

    The state of Linux Gaming

    With the growing community of Linux gamers, the attention on Linux gaming is improving, a lot. Especially this year with the announcement of the Steam Deck (A Linux-based, switch like sized, mini PC), the Linux market share has never been that populated.

    GOL - Market Share
    Source : Gaming on Linux / Steam Survey

    1% of market share may not seem that high but, it’s a big leap forward for the open-source and gaming community as a whole. A free and open-source alternative is possible.

    Linux also bring several advantages over a Windows OS, It is usually faster, customizable, the base OS consume less RAM, more stable and of course it’s free and open source. Overall, it offer a boost of performance when used with a native or a well ported version of the game.


    What to do before switching to Linux ?

    Do not switch to linux right-away. Dual-boot it. Beginner friendly distributions like Ubuntu can have an integrated part in the installation process to dual boot with Windows.

    Using that method permit a no-compromise solution, where you can try and enjoy the best of both worlds. Try and prepare your OS first, then you can get rid of Windows if needed or if everything works as expected.

    Check your compatibility

    Depending of your hardware & your games, some components may require some tinkering or may not work at all.

    For the hardware support, if you have a standard gaming PC everything should be OK, from my experience only obscure tablets, strange SOC or some laptops with specific hardware can experience difficulties running Linux. If you are not confident you can just lookup for your hardware compatibility on the internet or try a live version of the Linux distribution of your choice.

    For game compatibility you can use one of the best tool out there : ProtonDB it list every Steam game and how well it works. Even if only Steam games are listed here, you can check Lutris for a lot of other games.

    ProtonDB
    ProtonDB Homepage
    Note : A lot of Multiplayer games are not working due to anti-cheat compatibility issues, the situation is improving but that something you need to keep in mind.

    Choosing which distribution of Linux to use

    Honestly, there is thousands of Linux versions, It’s really up to you. I can only recommends the most used, user-friendly and maintained distributions like Ubuntu or Fedora.


    Native games and Proton

    There are several ways you can play Linux titles.

    Linux Native games. Some games are build to work natively on Linux, there are not munch but they do exists ! In that case, install it and play it like you will on your Windows PC.

    Proton is a compatibility layer developed by Valve. Basically, it allow Windows games to run directly on Linux. Because Linux and Windows do not use the same kernel and are built differently, you can’t run a Windows game directly on Linux. The game or program makes calls to the system in a specific way so you need a way to convert system calls made for Windows to Linux. That’s precisely what Proton is doing.

    Other solutions. Other solutions exists too like Wine or CrossOver, but there are more complicated to setup or paid solutions. That’s why we will focus on the two previous one.

    Note : Proton is based on Wine (Wine Is Not an Emulator)

    How to play ?

    Steam games

    Great , now that you have been introduced to the technologies that makes Linux gaming possible, I will show you how to play easily any game using this tools (Or at least try too).

    First, Install Steam, you can install it using the graphical interface app store of your system or by typing this command in your terminal.

    Steam installation (Ubuntu)

    sudo apt install steam

    Launch Steam, you will see a penguin icon to the top of your games list. Click on it, it will show you Linux native only games.

    find-windows-game-steam
    Source : How To Geek

    Good, to play every games of your library, click on the icon again to show all of your games, non native games are greyed out, you need to enable proton in Steam to install and play them.

    For that heads to the settings, properties, compatibility tab.

    steam-game-select-properties
    Source : How To Geek

    Check the case “Force the Use of a Specific Steam Play Compatibility Tool.” It should be the only option available.

    steam-game-compatability-options
    Source : How To Geek

    You can now install and play most of the games of your Steam library.

    Keep in mind, not every game is playable or even downloadable, check the game databases to see the level of compatibility.

    Other games

    You can also install Lutris, to play any non-steam games, or you can just use Lutris as an global launcher for all of your games (Steam included)

    💡Supported games of other launchers include Epic Games, GOG and more ...

    Lutris is needed for other games, in addition of using the Proton compatibility layer, it also provide the necessary scripts for the installation and the execution of other games.

    To install Lutris, you can either download it from your OS application store or follow the documentation on their website. You first need to add the Lutris repository, update the package list and install the Lutris package.

    Lutris installation (Ubuntu)

    sudo add-apt-repository ppa:lutris-team/lutrissudo apt update
    sudo apt install lutris

    Launch Lutris and access all of your games ! First click on “Lutris” in Sources, then type the wanted game of your choice. You can also connect every launcher account to access every other launcher games.

    gog-screen
    Source : Lutris Website
  • Manage temperatures & fans on Linux

    If you are here, you may had problems to manage your fans speed or check your temps on Linux.

    Fortunately there are some tools to help you with that, one of the most known is lm-sensors, it provide a tool for GNU/Linux systems to monitor and handle temperatures, tensions, fan speed & moisture levels.

    The current supported sensors are :

    • ISA hardware monitoring chips.
    • I2C/SMBus hardware monitoring chips.
    • SPI hardware monitoring chips.
    • Hardware monitoring features integrated in Super-I/O chips.
    • Hardware monitoring features integrated in south bridges.
    • Thermal sensors integrated in CPU.
    • Thermal sensors integrated in memory modules.

    Installation & detection

    Proceed to the installation of “lm-sensors”.

    sudo apt install lm-sensors

    Then you can run the sensor detection tool.

    sudo sensors-detect

    The output should look like this, it can vary depending of your hardware.

    sensors-detect version 3.6.0# System: ***# Board: ***# Kernel: ***# Processor: ***This program will help you determine which kernel modules you needto load to use lm_sensors most effectively. It is generally safeand recommended to accept the default answers to all questions,unless you know what you're doing.Some south bridges, CPUs or memory controllers contain embedded sensors.Do you want to scan for them? This is totally safe. (YES/no): Module cpuid loaded successfully.Silicon Integrated Systems SIS5595...                       NoVIA VT82C686 Integrated Sensors...                          NoVIA VT8231 Integrated Sensors...                            NoAMD K8 thermal sensors...                                   NoAMD Family 10h thermal sensors...                           NoAMD Family 11h thermal sensors...                           NoAMD Family 12h and 14h thermal sensors...                   NoAMD Family 15h thermal sensors...                           NoAMD Family 16h thermal sensors...                           NoAMD Family 17h thermal sensors...                           Success!    (driver `k10temp')AMD Family 15h power sensors...                             NoAMD Family 16h power sensors...                             NoHygon Family 18h thermal sensors...                         NoIntel digital thermal sensor...                             NoIntel AMB FB-DIMM thermal sensor...                         NoIntel 5500/5520/X58 thermal sensor...                       NoVIA C7 thermal sensor...                                    NoVIA Nano thermal sensor...                                  No

    Here the lm-sensors software is trying to guess what kind of CPU you have to find which sensors are present, some prompts will then appears, just go for the recommended values and reboot.

    If you have a graphics card, your GPU sensors should also be recognized.

    To check every detected sensors, just type the following command.

    sensors

    If you are running on a laptop, this install can provide more information to your fan controllers and in some case, resolve fan speed & temperatures issues.


    GUI for Temperature & Fan speed visualisation

    You can use psensor to get a quick visualisation of your temps and fan speed after executing the lm-sensors tool

    sudo apt-get install psensor
  • Install / Recover Iomega ix4-200d firmware

    Install / Recover Iomega ix4-200d firmware

    You may have accidentally erased your whole NAS drives or just been a victim of a software bug, but for a  reason or another your Iomega NAS may have lost his firmware.

    Front screen error
    IX-Front-Screen-Error

    On theses devices, the firmware is located on the installed drives, not in an integrated flash memory on the device, so if you lose your drives data, you may as well lose the OS.

    This product being in EOL (End Of Lifecycle) it’s very difficult to find resources about how to install the firmware again, plus theses devices were shipped with the drives and firmware installed.

    From what I’ve found online, you have to reach to Lenovo directly to get a recovery software/solution for the NAS, but there is also several other solutions.

    Warning : This is going to recover your Iomega device in working condition, this will not recover your drives data. This method also seems to not work for everyone so be advised.

    First we need some tools and firmware to recover the NAS :

    • Lenovo Iomega ix4-200d (Cloud or non cloud version)
    • Two base hard drives to install the firmware on
    • FAT 32 Formatted USB Drive
    • The needed backup files (Files and mirrors linked)

    Rodolfo & Braulio patched backup files

    Older firmware backup : Mirror 1Mirror 2

    First we need to prepare the drives, but with the recent updates, drives now needs to be initialised in GPT for larger capacity support, you also need to wipe them completely to erase any older partition data. To do that you can use your disk manager on MacOs, Windows and Linux.

    Method 1 : Classic installation

    Prepare your NAS, Remove every drives except the drives in the slot 1 and 2, they will be the targeted disks for the firmware install. Two disk are recommended to rebuild the raid group directly, but if the installation fails, you can try again with only one.

    Make the bootable recovery USB, you first have to format your USB key to FAT 32, then extract the ix4-200d-recovery file to the USB support.

    Install the firmware, Then, plug your USB key to the back, on the top USB port of the NAS. While pressing the NAS reset button, power on the NAS, keep holding for 60/70 seconds. The device will reboot. After the reboot logo showed up, you can release the reset button, watch for the hard drive blue activity light to see if you succeed.

    Finish the installation, Wait for the firmware to do his business, it should take about 5 to 10 minutes, the unit should turn off and back up again, If it’s not turning on, start it manually. Keep the USB plugged until the usual interface shows up. Then shut it down, remove the USB drive and start it again !

    You now should have a working NAS again ! Some updates may be available in the update tab as the firmware still not the most recent.

    Method 2 : Physical installation

    Follow the instructions of the instructions.txt file from the downloaded files (Specific hardware needed)

    Mirror 1 Mirror 2

    Special thanks to Rodolfo & Braulio for keeping upgrading this guide with their new patched firmware !